Step-by-Step Guide to Making Your Own Water Pipe
Whether you have a bong or not, making your bong allows you to indulge in your preferred cannabis strains. You may quickly construct a homemade bong with only a few common household objects. If done properly, creating a bong at home is fun and a terrific way to consume cannabis.
Got bud but no papers? Perhaps you’re visiting a friend, but they don’t have a bong? So, do not be alarmed. Here, we’ll demonstrate three DIY techniques to help you create bongs.
A bong is a water pipe used to smoke tobacco, cannabis, or other substances. Gravity bongs, bamboo bongs, plastic bottle bongs, and glass bongs are a few of the several varieties of bongs.
Table of Contents
What Makes a Good Homemade Bong?
Any plastic bottle or jar will work, but remember that the larger the container, the bigger the bong hits. A good DIY bong should have a stable base, airtight seal, smooth airflow, and the right amount of water.
Understanding the Basics: Parts of a Bong
If you’re new to smoking cannabis, knowing the fundamentals of a bong is important. A bong, commonly called a water pipe, is a smoking device that filters and cools the smoke before inhaling it. It comprises a few important components for giving you the best hit of smoke.
The bowl is the first and most noticeable component of a bong. The herb should be placed here before being lit. The downstem, a tube that joins the bowl to the water chamber, is attached to the bowl. The water chamber is where the magic happens. As the smoke travels through the downstem and into the water, the water in the container cools and filters it.
The Basics of Making a Homemade Water Bong
A handmade water bong is simple and inexpensive to make. Just take a plastic bottle, put a downstem in it, and put water in it. Place the bowl on top of the bottle, ignite it, and take a breath. You can modify your bong using different bottle sizes, down stems, and bowl types.
The Essentials: Parts of a Homemade Bong
Plastic bottle (such as a 2-liter soda bottle)
Metal or glass downstem (purchased or homemade)
Bowl (metal or glass)
Water
The 3 Best DIY Bongs
Plastic bottle bong
Gravity bong
Ceramic bong
Carb or Carburetor
Not all bongs have to have a carb, but if you see a teeny tiny hole on the side or back of the bong, this is your carb. This little hole helps you control the size of your hits with your index finger.
How to Make a Homemade Bong: 4 Options
A DIY bong is a great option if you’re in a bind and require a quick and simple smoking device. Here are four varieties of DIY bongs that you can create with supplies you already have around the house.
Plastic Bottle Bong
All you need to make the most basic DIY bong is a plastic bottle, a bowl, and a downstem. You’re ready to smoke when you cut the bottle in half, attach the bowl and downstem, and add water to the bottom. Even better, you can drill a hole in the side to accommodate a downstem.
The Gravity Bong
This bong employs water and air pressure to produce a powerful hit of smoke. You only need a bucket of water, a bowl, and a plastic bottle. Cut the bottle in half, attach the bowl, and downstem, then submerge it in the bucket of water. Lift the bottle out of the water slowly, stopping just before it does so while lighting the bowl.
Ceramic Bong
This a cool option if you have some time to wait for your bong, but it will need to go through a kiln once or twice, so it will likely take a couple of days to a week before you’ll have a DIY waterpipe using this option.
Honorable mention – Apple Pipe
If you have an apple on hand, this is a nice alternative, even though it isn’t a bong, technically. You can quickly and easily create a smoking device out of an apple by simply carving off a bowl and mouthpiece.
Here are some simple steps on how to use an apple for smoking:
Materials needed:
An apple
A sharp knife
A skewer or a thin stick
Instructions:
Pick a firm, fresh apple that is free of bumps or blemishes.
The apple should be properly washed and dried with paper towels.
Cut off the apple’s stem end with a sharp knife while holding the apple upright. Your pipe’s bowl will be this. Twisting and pulling the stem off works as well.
Make a hole in the apple’s center, where the stem once stood, using a skewer or other thin object. The apple should have a hole about midway down its length.
Make a small hole with the sharp knife on the side of the apple, a centimeter below the bowl’s rim. This will act as the air hole or carburetor.
Put a pinch of bud in the apple’s bowl, lightly packed.
Light the weed with a lighter or match, hold the apple with your palm covering the carb hole, and inhale through the top of the apple, where the bowl is.
Release your hand from the carb hole as you inhale to allow air to enter the apple and remove the smoke.
Building the downstem and bowl
Making a DIY bong requires building both the downstem and bowl. Here is one way to create a downstem:
Materials you may need:
Glass tubing with a diameter just a little bit smaller than the bong joint
Cut glass or use a fine-tipped saw.
Or use a file.
An energy source (e.g., lighter, torch)
Instructions For Making a Downstem:
Measure the downstem’s required length for your bong.
Cut the glass tubing to the required length using a glass cutter or fine-tipped saw.
The sliced glass’s edges should be smoothed with sandpaper or a file.
The glass tubing should be heated at the point where it will be placed into the bong’s joint.
Shape the hot end into a little bulb while holding it.
Give the glass time to cool.
Building a Homemade Gravity Bong
Materials needed:
A plastic bucket
A plastic bottle
A bowl or a socket wrench
Water
Instructions:
Cut the bottom of the plastic bottle off.
Put some water in the bucket.
Put the bottle in the water, cutting the top off, so it is above the surface.
Stack the bottle on top of the bowl or socket.
Light the bowl, then slowly raise the bottle.
The bottle will start to fill with smoke as it is raised.
Remove the bowl when the bottle is almost completely submerged and breathe in the smoke.
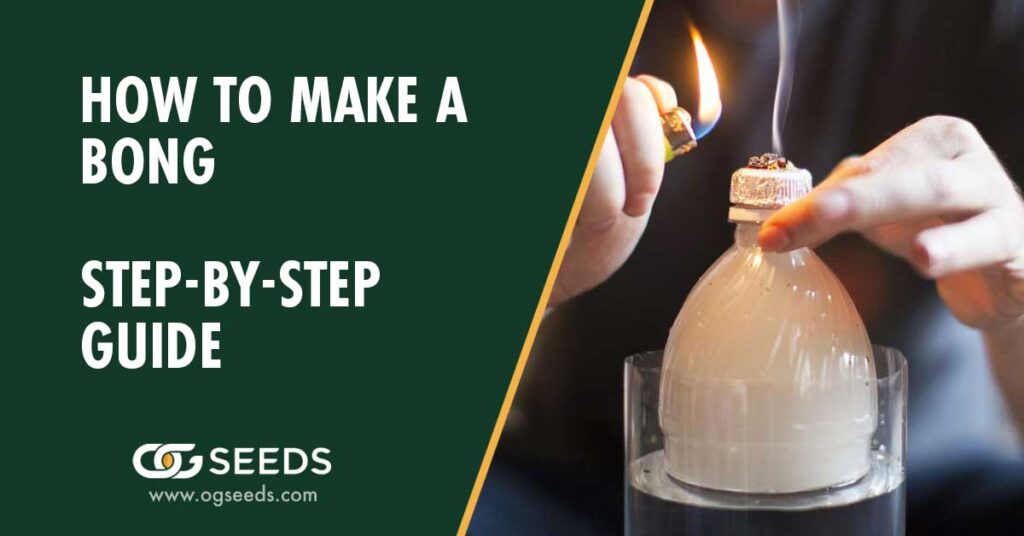
How To Make A Water Bottle Bong
Materials needed:
A plastic water bottle
A small socket
A metal pen barrel or a downstem
A lighter
Scissors or a sharp knife
Aluminum foil
Instructions
Take the cap off of your plastic bottle.
Make a tiny hole near the bottom of the bottle using a lighter or another hot object.
If you want, cut or burn another hole towards the top to use as a carb.
To make the hole slightly larger, use a pen or something similar.
Make sure a downstem fits tightly in the opening before inserting it. A downstem can be either a glass or a metal pen tube.
Attach a bowl or component in a cone shape to the downstem’s top.
Make sure the downstem is completely immersed while adding water to the bottle.
How To Make A Mason Jar Bong
Materials:
Mason jar with a lid
Downstem
Bowl
Rubber gasket or silicone sealant
Scissors or knife
Drill or punch tool
Instructions:
The first step is to cut three holes—two of equal size and one smaller one for the carb—into the lid of any jar you can find at home.
Pick a mason jar that fits your bong properly.
Make a hole big enough to fit your downstem in the center of the lid by drilling or punching it.
After trimming it to the proper length, ensure the downstem fits snuggly through the lid’s hole.
To make a watertight seal, put the silicone sealant or place the rubber gasket around the downstem where it enters the lid.
Affix the bowl to the downstem’s top.
Water should be added to the jar’s desired level, allowing the smoke to expand.
As soon as the lid is on the jar, tighten it completely.
Pros and cons of each bong type
Popular DIY ones include the gravity bong, plastic bottle bong, and ceramic bong, each of which has advantages and disadvantages of its own.
Heavy smokers like gravity bongs because of their propensity to give a huge hit of smoke all at once. They only take a few basic home supplies and are simple to construct. They can be messy, and their smoke can be abrasive, so they might not be the best choice for novices or people with delicate lungs.
Plastic bottle bongs are the most simple to make. They are adaptable, and the size and shape can be changed to suit individual tastes. However, heating plastic can cause it to produce dangerous compounds that could be harmful to your health. Plastic bongs usually last only a short time because they are not as strong as ceramic bongs.
Although more difficult to produce than plastic bongs, ceramic bongs are considered a safer and healthier alternative. They are also more attractive, long-lasting, and durable. But because they need a kiln and other specialized equipment to make, the typical person needs more access to them. They may not be appropriate for beginners because they can be bulky, delicate, and challenging to clean.
Bongs vs. Joints
Bongs: Pros:
Water filtration cools and smooths the smoke, making it less harsh on the throat and lungs
It can deliver a larger hit, allowing for quicker and more intense effects
It may be more efficient in delivering THC due to reduced smoke loss
Cons:
Often require more maintenance and cleaning
It can be bulky and less portable
It may be more expensive than rolling papers.
Joints
Pros:
Convenient and portable
Easy to roll and smoke
It can be a social activity, as joints can be passed around in a group
Cons:
Smoke can be harsh and irritating to the throat and lungs
Rolling papers may contain additives or chemicals that can be harmful to health
It may not be as efficient in delivering THC, as some smoke may be lost to the air
Make a Ceramic Bong Using a Pottery Wheel
A pottery wheel may be used to create a bong. Creating a ceramic one is more complex and time-consuming because it calls for access to a pottery wheel and some level of ceramics expertise.
It’s always best to make the bowl, stem, and base when building one on a pottery wheel. Traditional ceramics techniques can create the bowl and stem, and a powerful adhesive can secure the base. The bong is prepared for use after being burned in a kiln and glazed.
How To Make a Bong – Final Thoughts
Various solutions are available to fit diverse preferences and ability levels when building it DIY. A plastic bottle one is perfect for beginners seeking a basic and economical solution. In contrast, a gravity bong is a terrific option for people who want a quick and easy way to obtain a big hit. On the other hand, a ceramic bong may take more time and work to build, but it can produce a one-of-a-kind, aesthetically appealing object that offers a comfortable smoking experience.
Whatever solution you go with, it’s best to always use your handmade bong responsibly and safely. Use only premium materials, keep it clean, and avoid using cheap materials that could harm your health. You can make your unique bong that suits your requirements and tastes by following these suggestions and experimenting with various approaches.


