


3 Week Old Autoflower – Week-by-Week Guide
If you’re a new grower, 3 week old autoflower may be the best option for you! Auto-flowering plants require far less upkeep than other methods like photo flowering. The autoflower life cycle is less demanding and great for those starting out due to its lower amounts.
The vegetative phase lasts about 2-4 weeks, and you keep it under light nonstop. Unlike regular cannabis plants, autoflowering plants switch from the vegetative to the flowering stage without requiring a change in light schedule.
This is because autoflowering plants have a built-in flowering cycle that gets triggered by age instead of changes in light exposure.
Order autoflowering seeds from us! And gather all supplies needed, such as a spot indoors or outdoors, a light source, water, a carbon filter, and a fan.
Feed your plant nutrient-rich solutions less often and flood the soil with water every day.
So, seasonal calendar growth is not a concern. Growers looking for multiple harvests are drawn to autoflowers for this reason. It’s the perfect choice if you’re short on time or new to growing Cannabis. Additionally, autoflowers have an enhanced resistance to pests and pestilence and a broader climate tolerance.
Table of Contents
Stages Of An Autoflower Life Cycle
- Germination seeds-Germination process
- Seedling stage
- Vegetative stage
- Flowering stage
How Long Do Auto flowers Take From Seed To Harvest?
The average time it takes for an auto flower seed to grow and reach harvest is around 75 days. This can partly depend on the specific phenotype as well as environmental conditions.
When compared to a typical photo-dependent feminized (or regular) strain, this is a huge time saving.

What Are the Benefits of Growing Autoflowers?
For new growers, the autoflower’s shorter life cycle is going to be the easiest for you to start your growth journey with. There’s a constant light cycle required.
How Does A Healthy 3-Week-Old Autoflower Look?
- Lush & vibrant green leaves
- No yellowing or brown spots
- Upright stem (little to no bends)
- No droopy leaves
- No pest or mold issues
- Between 2-5 nodes
- Learn More
Other Normal Growth Characteristics
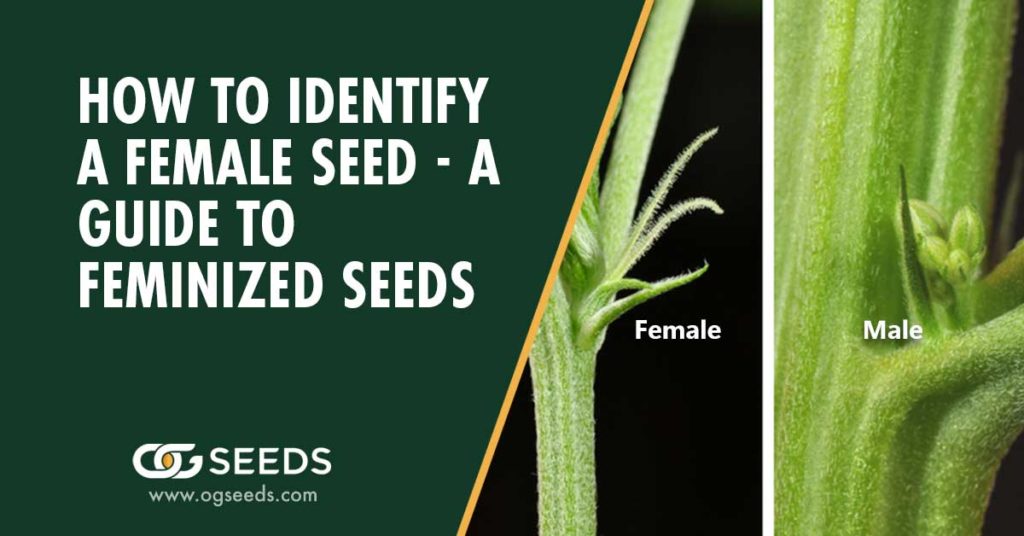
- Possibly showing sex (tiny white hairs)
- Wider growth rather than tall
- Beginning to flower (quicker strains flower faster)
- Separate strains growing at different sizes
3 Week Old Autoflower Problems & Solutions
Common Autoflowering Problems:
- Over/under watering
- Poor Soil
- Lack of light
- Wrong temperature or humidity
- Lack of nutrients
3 Week Autoflower Stunted Growth Solutions
If you’re wondering why your autoflower is having difficulty sprouting, remember that autoflowering creates lower amounts. However, if you’re still noticing small nodes, then it’s more than likely coming from a watering issue. If you’re growing your flower in its final stage pot, ensure you’re thoroughly watering around the seed. Large amounts of soil can absorb most of the moisture and leave your plant dehydrated. Humidity also plays a huge role. Remember that for the 3-week auto period, the humidity needs to be between 65-85 %.
Factors of Autoflowering that may cause issues
- Watering & pot sizes
- Autoflowering plants have specific water and nutrient needs, and if not met, they can cause issues such as nutrient deficiencies, mold, and root rot. Watering too much can suffocate the roots and prevent the plant from absorbing nutrients, while watering too little can cause it to wilt and become stunted. You should also use the right pot size, as a smaller pot can restrict root growth, and a larger pot may lead to overwatering. To ensure the plant receives the proper amount of water, you should use a pot that is just big enough to accommodate the base of the plant.
- Humidity & temperature levels
- Check the temperature and humidity: Autoflowering plants prefer a temperature range of 70-85°F and a humidity level of 40-60%. If the temperature or humidity in your grow area is outside of this range, it could cause your plant to become stressed or stop growing.
3 Week Autoflower Yellow Leaves Or Brown Spots
A variety of factors, including nutrient deficiency, pests, and diseases, can cause yellow leaves or brown spots on a cannabis plant. Keep your autoflower moist, but do not overwater it. An overwatered plant can develop yellow leaves and root rot, while a dehydrated plant can get yellow leaves and wilt.
3 Week Autoflower Discolored Leaves Solutions
Check for signs of pests, such as spider mites or thrips, which can cause brown spots on the leaves. Be sure to continuously check the plant’s nutrient levels and make sure it is getting the proper balance of nutrients since a deficiency can also cause discoloration. Ensure the plant is getting enough light. Autoflowering plants generally do well with 18-24 hours of light per day. Proper growing conditions are essential to avoid an aging/ dying plant.
3rd Week Autoflower Vigorous Growth Tips:
- Provide adequate light: Autoflowering plants need a lot of light to grow and thrive. Make sure they get at least 18 hours of light per day, using a high-quality grow light if necessary.
- It is important to use soil mixes that drain well because most autoflowers have a short lifespan, so you don’t want to let the roots sit in water.
- The optimal temperature and humidity level for autoflowering plants should be 70-85°F and 40-60% humidity.
- Provide proper nutrition: Autoflowering plants have specific nutrient requirements, so it’s important to use a fertilization schedule and product specifically designed for them.
- Prune and train your plants: Pruning and training your plants can help them grow immensely by directing their energy to encourage growth.
- Keep the plants healthy: Regularly check for pests and diseases and take appropriate action to keep your plants healthy.
Low-Stress Training (LST)
Low stress training (LST) is a technique that can be used to shape and control the growth of autoflowering plants. It involves bending and securing the branches of the plant in a way that encourages the plant to grow in a particular direction or shape. This can be a useful technique for autoflowers, as it allows you to control the overall size and shape of the plant without causing too much stress to the plant.
Tips for using LST with Autoflower Plants:
- Begin LST early in the vegetative stage: It’s best to start LST when the plant is still young and pliable, as it will be easier to manipulate the branches without causing damage.
- Use soft ties or wire to secure the branches: Use a soft material like twist ties or cloth strips to gently secure the branches in place. Avoid using hard or sharp materials, as these can damage the branches.
- Don’t bend the branches too much: Be careful not to bend the branches too far or too aggressively, as this can cause the plant to become stressed and may even break the branches.
- Monitor the plant’s growth and adjust as needed: Check on the plant regularly to ensure that the branches are secure and that the plant is growing as desired. Stay on top of the plant by making adjustments as needed.
Leaf Tucking
Leaf Tucking is where you bend the fan leaf back in order to help promote an even canopy and side branch growth. You can bend the leaves to give access to more light. When more light gets absorbed by all parts of the plant, this will create an even dispersion of light needed for the plant.
Topping
Topping is where you cut off the top of the plant, just above a pair of leaves, in order to encourage the plant to grow more branches. Using this technique can help increase amounts for autoflowering plants. Topping autoflowering plants should be done carefully in order not to damage them or leave them vulnerable to pests and diseases. It is also important to give the plant time to recover before resuming normal care and feeding.
Does Topping my Autoflower Make a huge difference?
Absolutely! While topping isn’t mandatory, many autoflowers thrive and flourish when having it done. There are several benefits to topping an autoflowering cannabis plant like increased amounts, improved light penetration, and airflow. By removing the growing tip, light can reach lower branches and buds, improving their growth and development. It increases airflow through the plant, which can help prevent mold and mildew growth. Toppling can increase a plant’s resilience to pests and diseases. Topping allows you to grow more colas in a smaller space rather than one big one.
It’s important to note that topping should be done at the right stage of growth, and it’s not suitable for all strains, autoflowering or photoperiod. Topping at 3 weeks can cause stress to the plant. It’s generally recommended to wait until the plant is at least 5-6 weeks old before topping it. It’s also important to allow enough time for the plant to recover and for new growth to appear before the flowering stage.
3 Week Autoflower Mold Or Pests
It is important to act quickly if your autoflowers begin to show signs of mold or pest infestation after just three weeks of growth. Three weeks old is a crucial time in the puberty development of the plant. Any mold or pests in proximity must be removed immediately.
Mold & Pest Prevention
To prevent mold, make sure that the plants have good air circulation and that the growing area is kept clean and dry. Avoid overwatering the plants, as excess moisture can lead to mold. If you do catch sight of mold, remove the affected leaves and increase the air circulation around it! In order to prevent pest infestations, inspect your plants regularly for signs of infestation, such as small holes in the leaves or insects. Spraying neem oil or using water and dish soap is the best method to get rid of pests.
Pests and diseases can also be prevented by maintaining a clean and hygienic grow room. This includes regularly cleaning and sterilizing your equipment and keeping the grow room free of debris and excess moisture.
3 Week Autoflower Types of Pests
- Spider Mites- Spider mites are small, spider-like pests that can infest cannabis plants, including autoflowers. By feeding on the plant’s cells, they can cause yellowing or browning of leaves, stunted growth, and reduced amounts.
- Fungus Gnats- A fungus gnat is a small, flying insect that can infest cannabis plants, including autoflowers. They are attracted to moist soil and can lay their eggs in the roots of the plant, causing damage and stressing the plant. Fungus gnat larvae can also feed on the lower stems and roots of plants, causing further damage.
- Powdery Mildew (PM)- Powdery mildew is a fungal disease that can affect cannabis plants, including autoflowers. This white, powdery substance appears on the leaves and stems of the plant and can cause yellowing or browning of the leaves, reduced growth, and reduced amounts.
Other 3 Weeks Old Autoflower Concerns
Is Flowering Normal For 3 Week Autoflower?
It is not normal for an autoflowering cannabis plant to begin flowering at 3 weeks. Plants that autoflower typically start flowering within 2-4 weeks after germination, though this can vary by strain and growing conditions. Some strains may begin flowering a bit earlier or later than others, but 3 weeks is generally considered to be very early for an autoflower to start flowering.
When Do I Get To See Buds From My Autoflower?
Flowering is the final stage of growth for an autoflowering cannabis plant. Its the stage when the plant begins to produce flowers, or resinous buds after germination, so around the 8-12 week mark. During the flowering stage, the plant will stop growing leaves and will instead focus all of its energy on producing buds. The buds will continue to grow and mature until harvest time.
Should Autoflowers Be Transferred At 3 Weeks?
It’s not recommended to transplant autoflowering cannabis plants at 3 weeks of age since they are sensitive to disturbance and can be easily stressed by the transplanting process. Autoflower plants have a fixed shorter life cycle. They do not rely on changes in light cycles to flower, so they do not benefit from a transplanted like traditional photoperiod plants do. When your plant’s roots are tightly packed in the container, and there is no more room for them to grow, it may be necessary to transplant it to a larger pot. However, handling the plant carefully and avoiding stress during the transplanting process is important.
What Are The Best Autoflowering Strains
All of our Autoflowering strains are the best on the market, which is why we carry them. Take our quiz to pick the strain that best suits your needs. For your convenience, we have listed our 5 most popular autoflowering strains below.
Remember, autoflowers don’t require as many nutrients as traditional varieties. You can reduce the recommended dose by half or even by a quarter, depending on your packaging choice.
Final thoughts – 3 Week Old Autoflower
Many growers started their journey into growing by beginning with autoflowers. Autoflowers grow in a total of around 75 days. You can speed up flowering by placing the plant in complete darkness for 48 hours, then using an 11/13 light cycle throughout the flowering period. This tricks the plant into believing it’s winter and encourages growth faster.
When your autoflower is at 3 weeks old, you should notice one stem with smaller leaves around it. Check for any sign of slow growth, such as yellow or brown spots, pests, or anything peculiar. Make sure your autoflower is receiving proper nutrients and sunlight. An autoflower life cycle goes by fairly quickly! Enjoy!
![How Long Does It Take To Grow Cannabis? [Indoors Vs Outdoors]](https://ogseeds.com/wp-content/uploads/2023/01/How_Long_Does_It_Take_To_Grow_Weed_Indoors_Vs_Outdoors_1200x628-1024x536.jpg)
